The Iron Grip Blueprint: Ground-First Assembly, Finger Channels & Biomechanical Connection
Book Title: The Ground-First Golf Blueprint: Precision Setup Geometry, Progressive Offset & Dynamic Flow
Volume / Section: Part III — Iron Grip & Striking Blueprint
Target Equipment: Callaway Apex Ai300 Irons (4i–PW) • $2^\circ$ Flat Lie Angle
Cross-References: book_index.md • part_1_foundations_and_biomechanics.md • part_2_11_step_core_routine.md
Visual Assets: iron_grip_guide.svg • iron_grip_guide.png
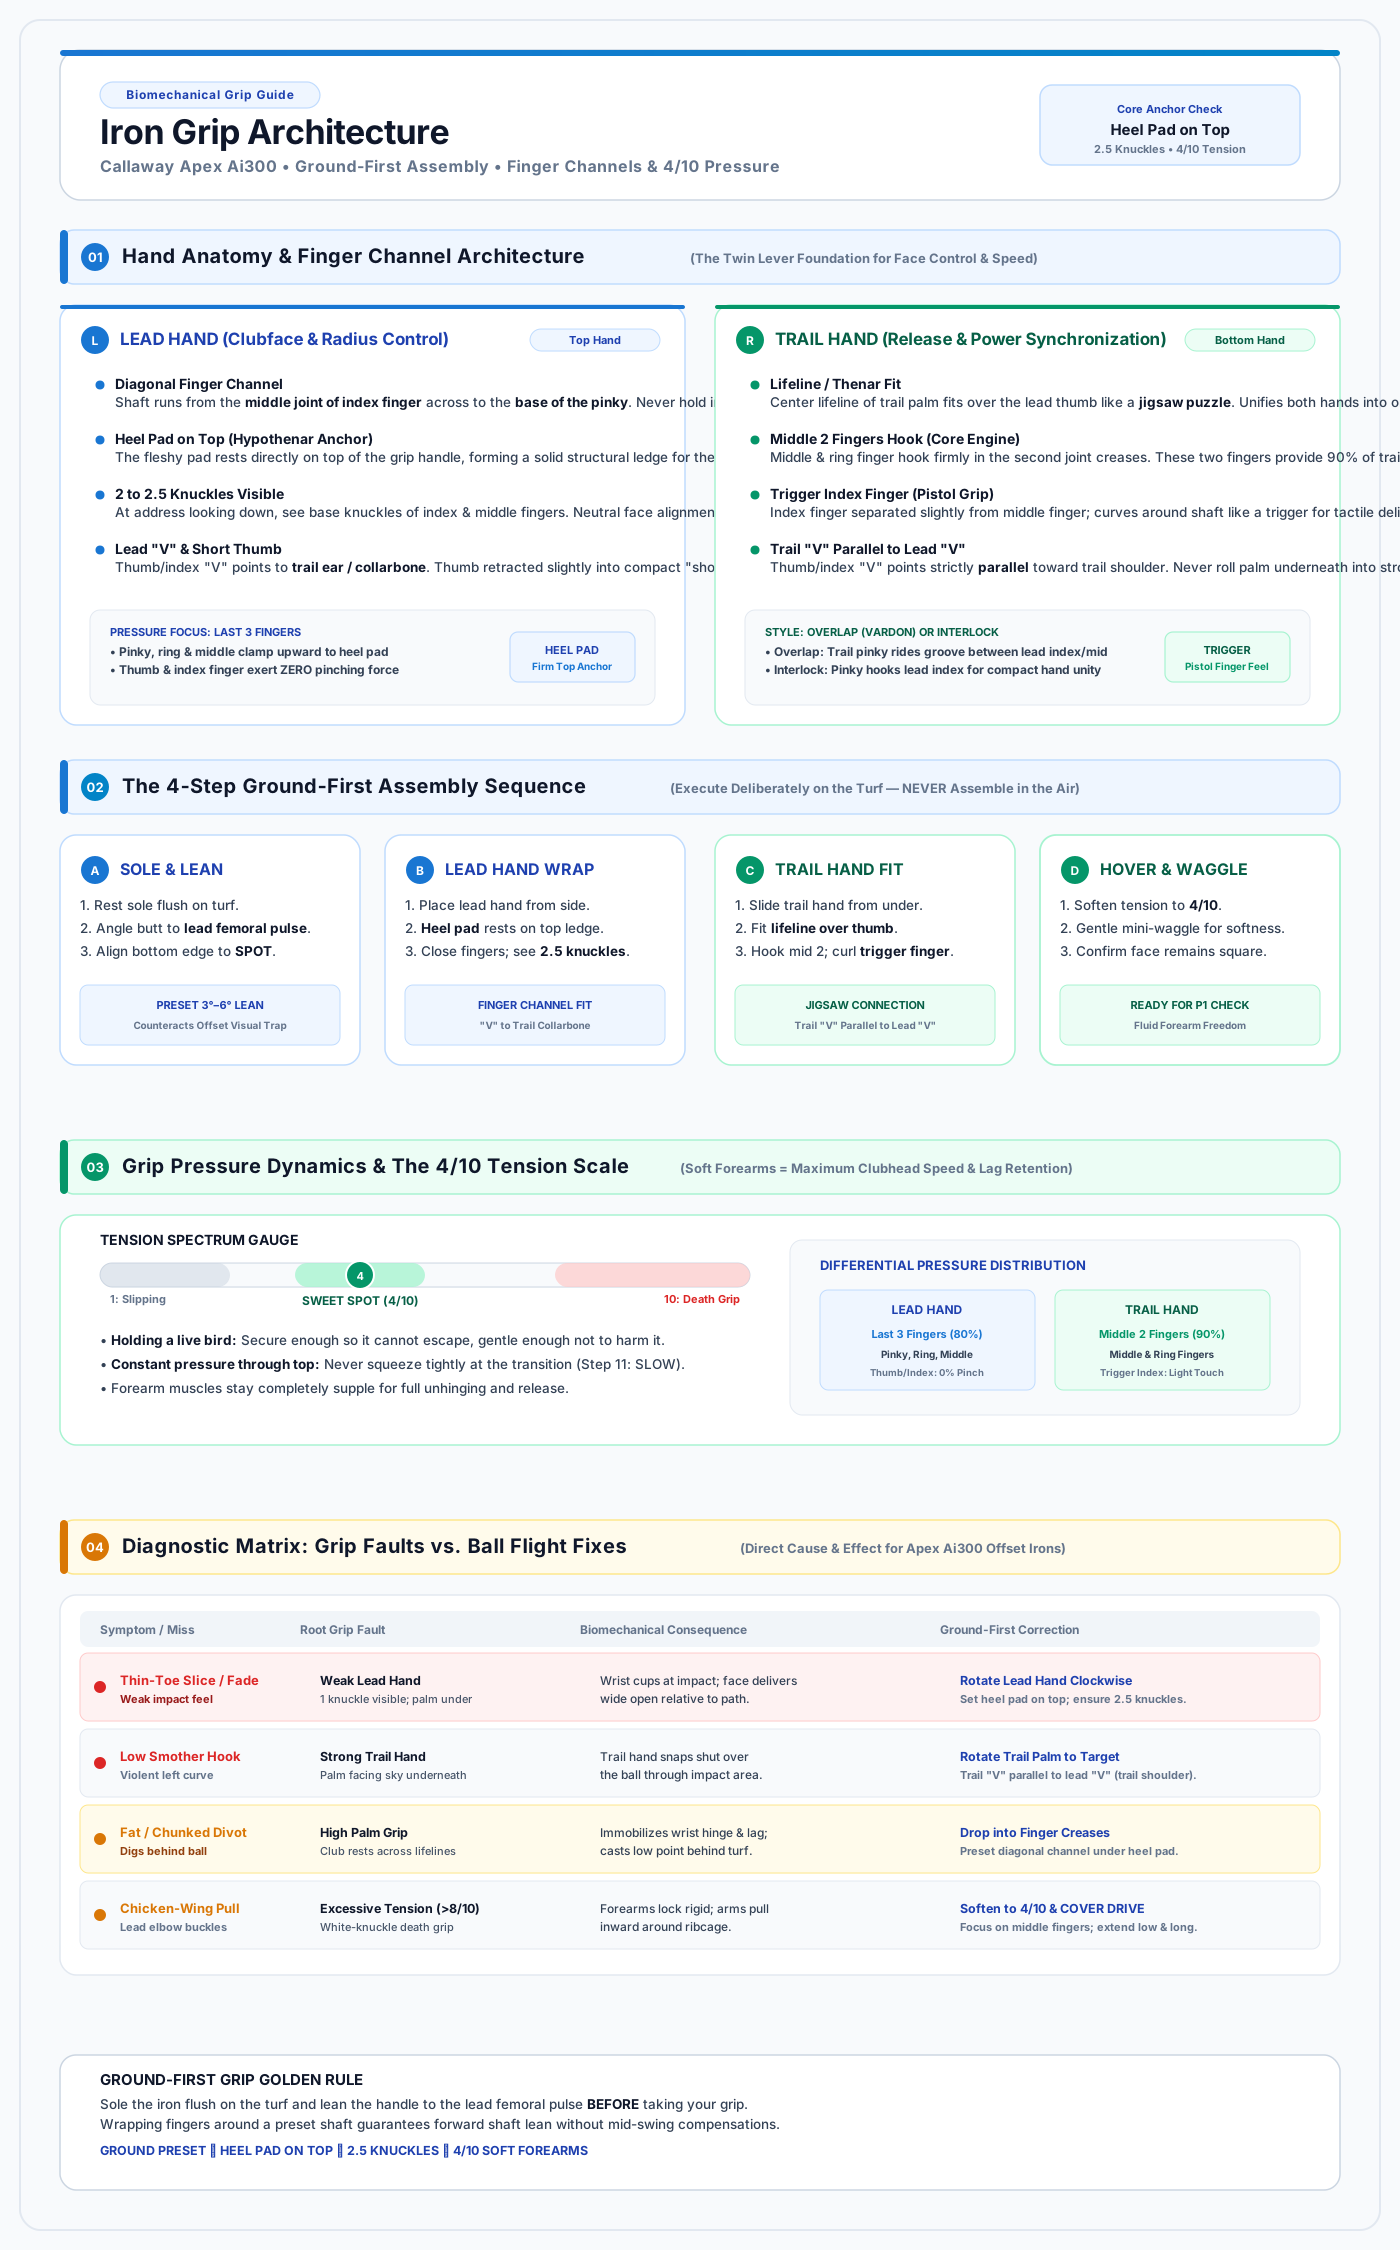
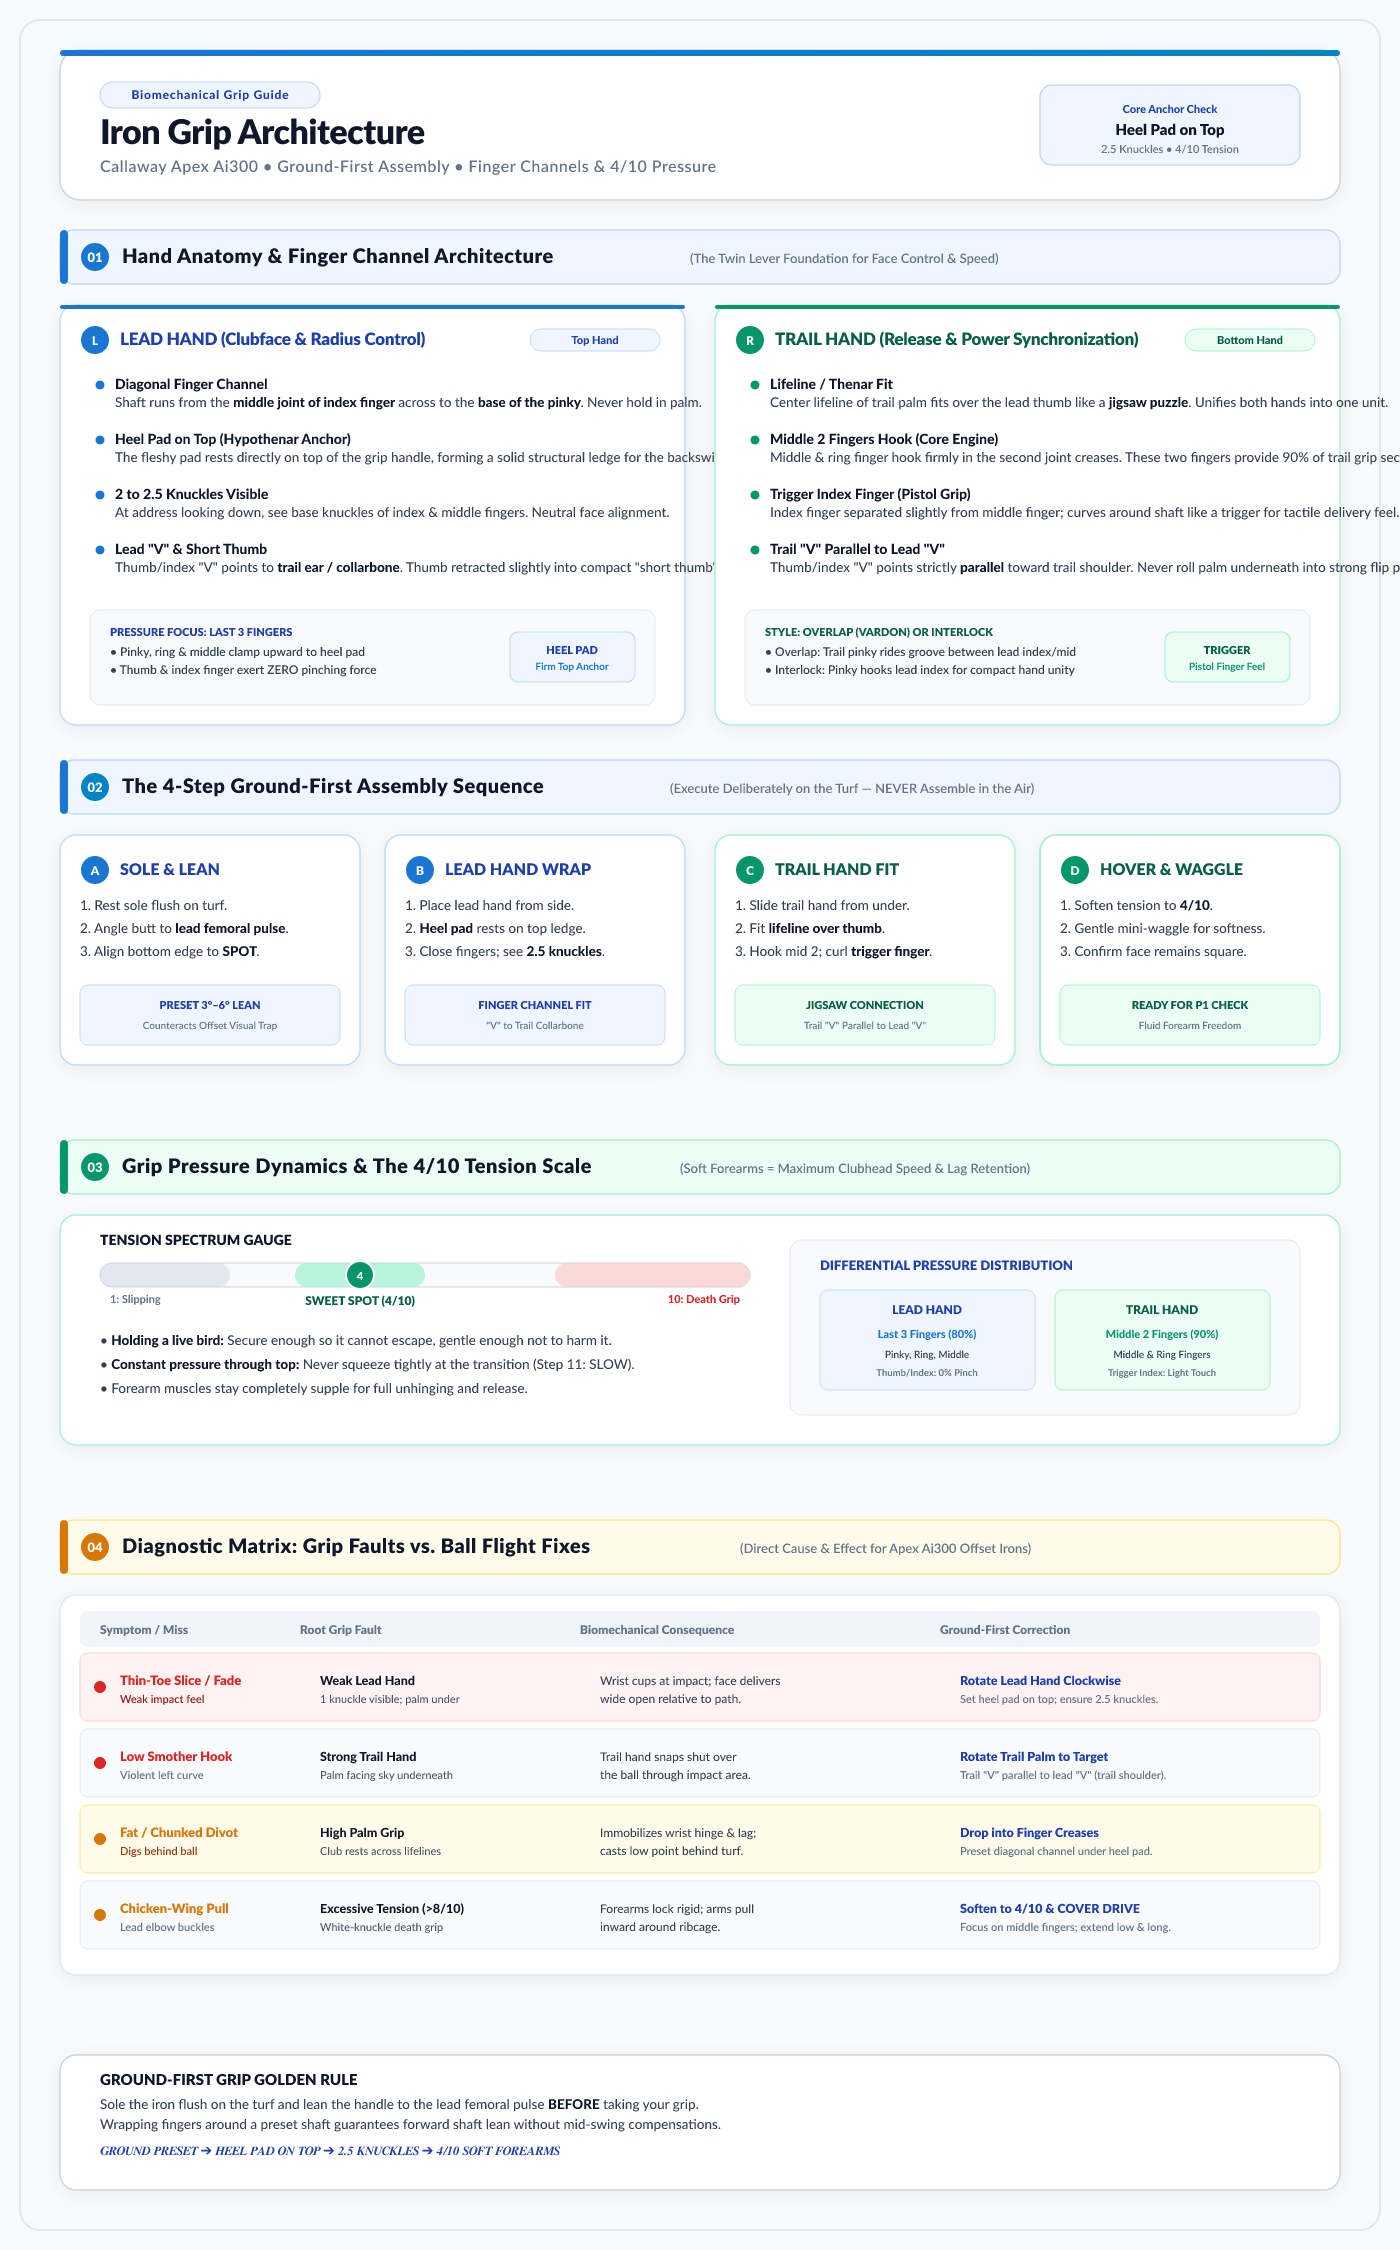
1. Executive Summary: Why the Ground-First Grip Solves the Offset Problem
The grip is the golfer's only physical connection to the club. In modern progressive offset irons (such as the Callaway Apex Ai300), the clubface leading edge is set back relative to the hosel and shaft axis.
When golfers grip the club in the air (or hover it before addressing the ball):
- The In-Air Levitation Error: The hands orient the clubface to what looks "square" in open space relative to the torso, not relative to the turf and ball.
- The Progressive Offset Trap: When grounded, the visual offset makes the clubface appear shut. Golfers instinctively re-grip, twist the shaft outward, or rotate their lead hand into a weak position (palm-on-top), which causes open-face impacts, thin-toe strikes, and slices.
- The Ground-First Solution: By grounding the club sole flush, presetting the shaft lean toward the lead femoral pulse ($3^\circ\text{–}6^\circ$), and wrapping the fingers on the turf, the grip geometry naturally locks in a square dynamic face and stable wrist angles.
2. Lead Hand Mechanics (Top Hand / Left Hand for RH)
The lead hand controls the clubface orientation and sets the swing radius. It must be a finger-oriented grip, anchored by the heel pad (hypothenar eminence).
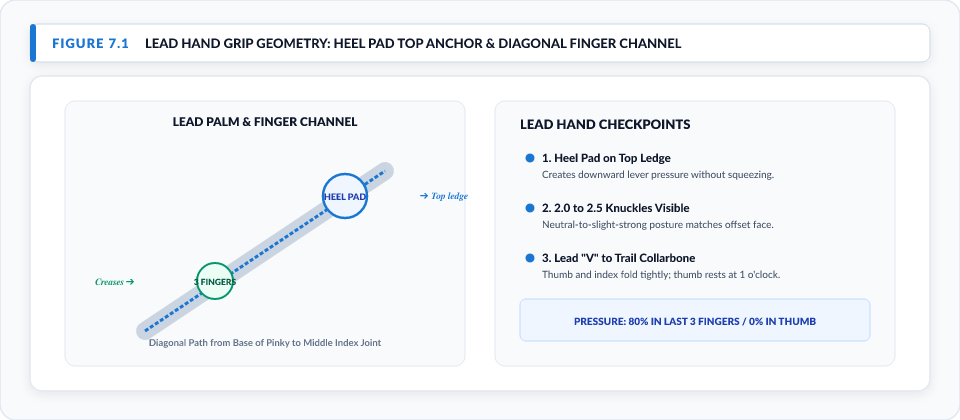
Figure 7.1: Lead Hand Grip Geometry: Heel Pad Top Anchor & Diagonal Finger Channel. View Vector SVG
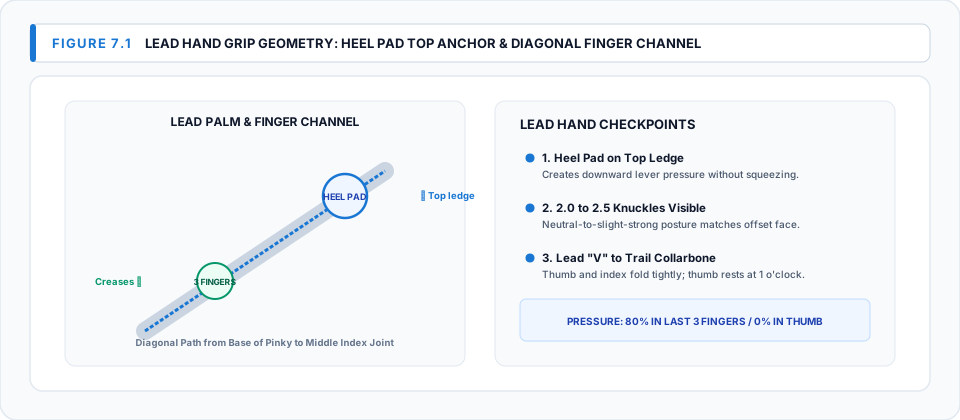
Key Lead Hand Checkpoints:
- The Diagonal Finger Channel:
- The grip shaft runs diagonally across the fingers: from the middle joint of the index finger across to the base of the pinky finger, directly beneath the fleshy heel pad.
- Never hold the club in the lifeline/palm. A palm grip immobilizes wrist hinge (radial deviation) and causes casting.
- Heel Pad on Top:
- The heel pad (hypothenar eminence) sits squarely on top of the grip handle. This creates a natural downward lever that supports the club at the top of the backswing without squeezing.
- Knuckle Visibility:
- At address, looking down with natural head posture, you should clearly see 2 to 2.5 knuckles (base knuckles of the index, middle, and partially ring finger).
- Lead "V" Alignment:
- The "V" formed between the lead thumb and index finger points toward the trail ear / trail collarbone.
- Short Thumb Position:
- The lead thumb is drawn slightly inward (a "short thumb"), resting just slightly on the trail side of the shaft centerline. This provides a firm structural stop at the top of the swing.
3. Trail Hand Mechanics (Bottom Hand / Right Hand for RH)
The trail hand provides speed, stability, and controls the release plane. It must sit directly opposite the lead hand, working in complete harmony.
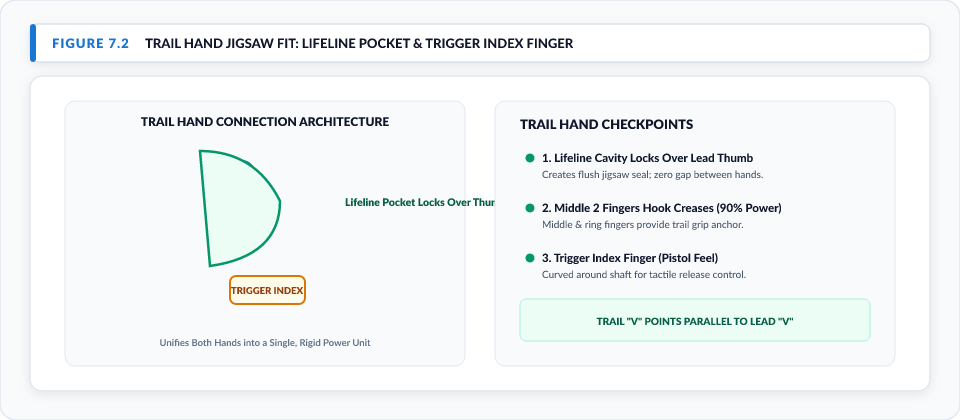
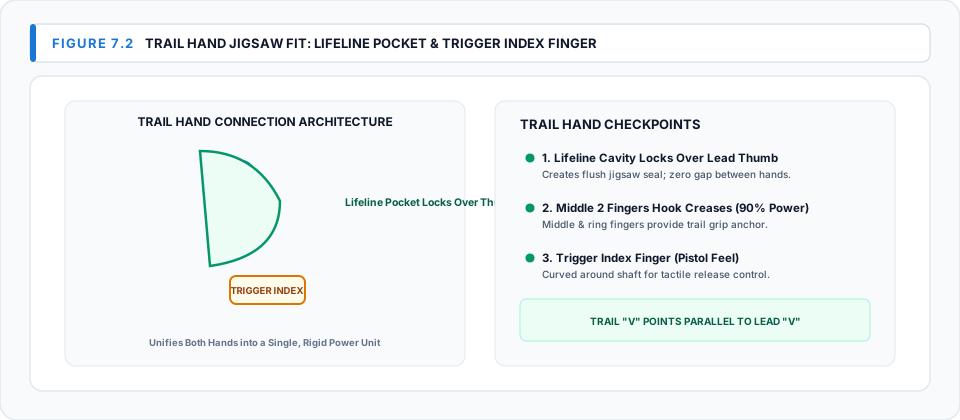
Figure 7.2: Trail Hand Jigsaw Fit: Lifeline Pocket & Trigger Index Finger. View Vector SVG
Key Trail Hand Checkpoints:
- The Lifeline Pocket (Thenar Fit):
- The center lifeline of the trail palm (thenar eminence) fits snugly over the lead thumb. The lead thumb nests securely inside the hollow of the trail palm.
- Middle Two Fingers Hook:
- The primary grip pressure of the trail hand is applied exclusively with the middle finger and ring finger in the finger crease.
- The Trigger Finger (Pistol Grip):
- The trail index finger separates slightly from the middle finger, curling around the underside of the shaft like a gun trigger. The pad of the index finger provides tactile feedback and controls the swing plane on the downswing.
- Trail "V" Alignment:
- The "V" between the trail thumb and index finger runs strictly parallel to the lead "V", pointing directly at the trail shoulder / collarbone.
- Trail Thumb Position:
- The trail thumb rests gently across the top-left side of the grip (pad touching the shaft), never pressing straight down the center.
4. Grip Style Comparison: Overlap vs. Interlock
Both styles are mechanically sound for iron play when executed with proper finger channels:
| Parameter | Overlap (Vardon) | Interlocking |
|---|---|---|
| Connection | Trail pinky rests in the groove between lead index & middle fingers | Trail pinky hooks and interlocks with lead index finger |
| Best Suited For | Medium to large hands; players seeking wrist freedom and relaxed grip | Smaller hands; players wanting unified hand unit and firm connection |
| Biomechanics | Reduces excessive trail hand dominance; encourages smooth body rotation | Unifies wrists into single lever; prevents hands separating at top |
| Recommendation | Standard Choice for Apex Ai300 irons | Preferred if hands feel disconnected at transition |
5. Grip Pressure Dynamics & The 4/10 Rule
Grip pressure is the primary regulator of swing speed and elastic lag:
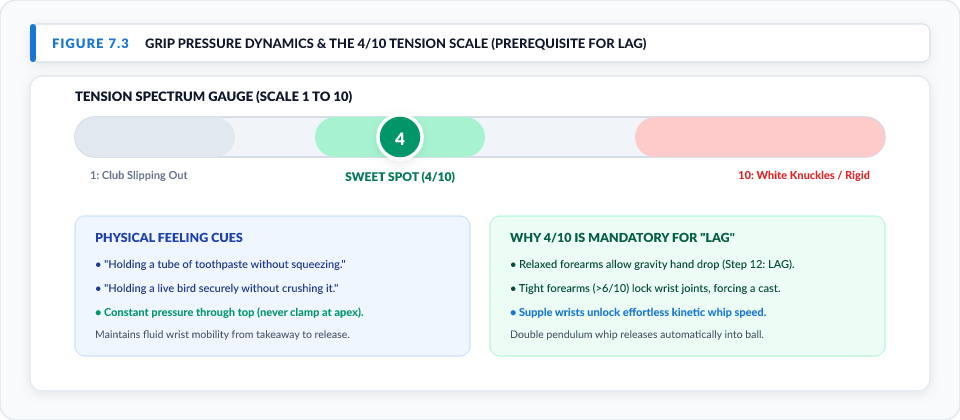
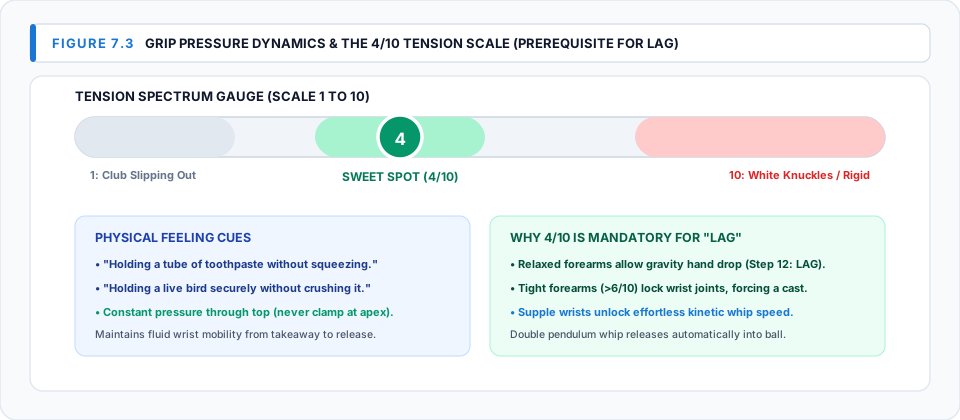
Figure 7.3: Grip Pressure Dynamics & The 4/10 Tension Scale (Prerequisite for Lag). View Vector SVG
Principles of Optimal Grip Pressure:
- The 4/10 Baseline at Address (The Prerequisite for "LAG"):
- On a scale of 1 to 10 (where 10 is squeezing with maximum force and 1 is letting the club slip out), address grip pressure should be 4 out of 10.
- Feel Cue: "Holding a tube of toothpaste without squeezing any paste out" or "holding a live bird securely without crushing it."
- If pressure exceeds 5/10, the wrist joints lock, making the vertical gravity hand drop (LAG) physically impossible and forcing a push/cast.
- Forearm Softness & The "Waiter's Tray" Hinge:
- Relaxed grip pressure enables the trail wrist to freely supinate and extend into the "waiter's tray" position at the apex of the backswing, locking the lead wrist flat and storing maximum lag.
- Dynamic Pressure Retention (No Death Grip at Transition):
- A major swing fault is squeezing tightly at the start of the downswing. By maintaining 4/10 pressure, the hands drop freely into the inside slot (LAG) while the uncoiling body snaps the clubhead through impact (WHIP).
- Differential Pressure Distribution:
- Lead Hand: Pressure is focused in the last 3 fingers (pinky, ring, middle) against the heel pad.
- Trail Hand: Pressure is focused in the middle 2 fingers (middle, ring).
- Index fingers and thumbs maintain zero clamping force.
6. The 4-Step Ground-First Assembly Sequence
To guarantee an infallible grip every time on the course, follow this sequential assembly protocol:
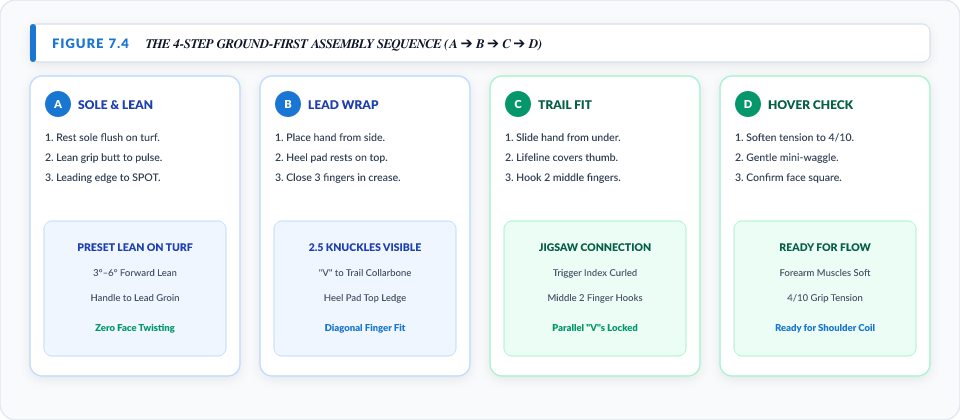
Figure 7.4: The 4-Step Ground-First Assembly Sequence (A ➔ B ➔ C ➔ D). View Vector SVG
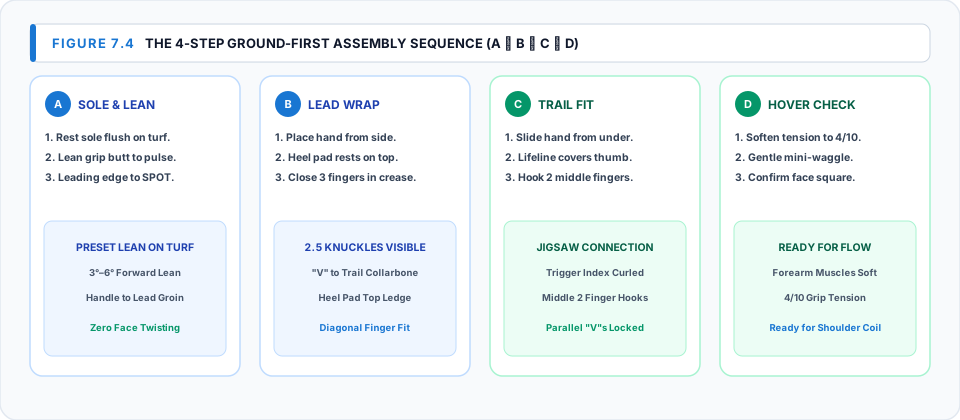
- Step A — SOLE & LEAN:
- Rest the iron sole flat on the turf behind the ball.
- Tilt the grip butt forward so it points directly at your lead femoral pulse / groin.
- Confirm the bottom leading edge is square to your intermediate SPOT.
- Step B — LEAD HAND WRAP:
- Without moving the clubhead, place the lead hand onto the grip from the side.
- Rest the heel pad on top, wrap the last 3 fingers across the diagonal channel.
- Confirm 2 to 2.5 knuckles visible.
- Step C — TRAIL HAND FIT:
- Slide the trail hand into position from below.
- Hook the middle two fingers, place the pinky into overlap/interlock, and fit the lifeline pocket over the lead thumb.
- Establish the trigger index finger and confirm both "V"s point to the trail shoulder.
- Step D — HOVER CHECK & WAGGLE:
- Lift the club 1 inch off the turf (or waggle gently) to confirm wrist softness (4/10 pressure).
- Ensure the clubface remains laser-square without rolling shut.
7. Diagnostic Matrix: Grip Faults & Ball Flight Fixes
| Symptom / Ball Flight | Root Grip Fault | Biomechanical Consequence | Ground-First Correction |
|---|---|---|---|
| Thin-Toe Slice / Weak Fade | Weak Lead Hand (1 knuckle visible; palm under shaft) | Lead wrist cups at impact; face arrives open to swing path | Rotate lead hand clockwise until 2–2.5 knuckles are visible with heel pad on top. |
| Dead Pull-Hook / Low Smother | Strong Trail Hand (Trail palm facing sky / under grip) | Trail hand violently flips closed through impact | Rotate trail hand counter-clockwise so palm faces target and "V" points to trail shoulder. |
| Fat / Chunk Behind Ball | Palm Grip (Club held high in palms) | Eliminates natural wrist hinge and lag; low point drops behind ball | Re-position grip diagonally in the finger creases below heel pad. |
| Early Casting / Loss of Speed | Excessive Grip Tension ($>8/10$) or Pushing Hands | Forearms lock; hands push at ball, dumping lag angle early | Soften grip to 4/10; let hands drop (LAG) while body uncoils (WHIP). |
| Face Twisting at Impact | Re-gripping / In-Air Setup | Hands torque the shaft during takeaway; face unstable | Execute Ground-First Assembly: sole club and preset lean before placing fingers. |
8. Summary Checklist for Iron Play
- Grounded First: Club soled and leaned to femoral pulse before hands touch the rubber.
- Finger Channel: Lead hand wraps diagonally in fingers; heel pad rests on top ledge.
- 2.5 Knuckles: Neutral lead hand with "V" to trail collarbone.
- Jigsaw Fit: Trail lifeline pocket fits snug over lead thumb; middle two fingers supply 90% trail pressure.
- 4/10 Tension: Soft forearms to enable trail wrist "waiter's tray" and gravity hand drop (LAG).
- Lead Shoulder Takeaway: Initiate takeaway by pushing the lead shoulder down into the trail heel with passive hands (Pair 1: SHOULDER • CONNECTED).