Fairway Woods & Driver Setup Blueprint: Sweeping Mechanics, Positive Attack Angles, and Hosel Optimization
Book Title: The Ground-First Golf Blueprint: Precision Setup Geometry, Progressive Offset & Dynamic Flow
Volume / Section: Part III — Fairway Woods & Driver Blueprint
Target Equipment:
• PING Fairway Woods (7W & 9W) — Hosel Setting: Flat $+1^\circ$
• PING G440 Max Driver (10.5°) — Hosel Setting: Flat 0
Cross-References: book_index.md • part_1_foundations_and_biomechanics.md • part_2_11_step_core_routine.md
Visual Assets:
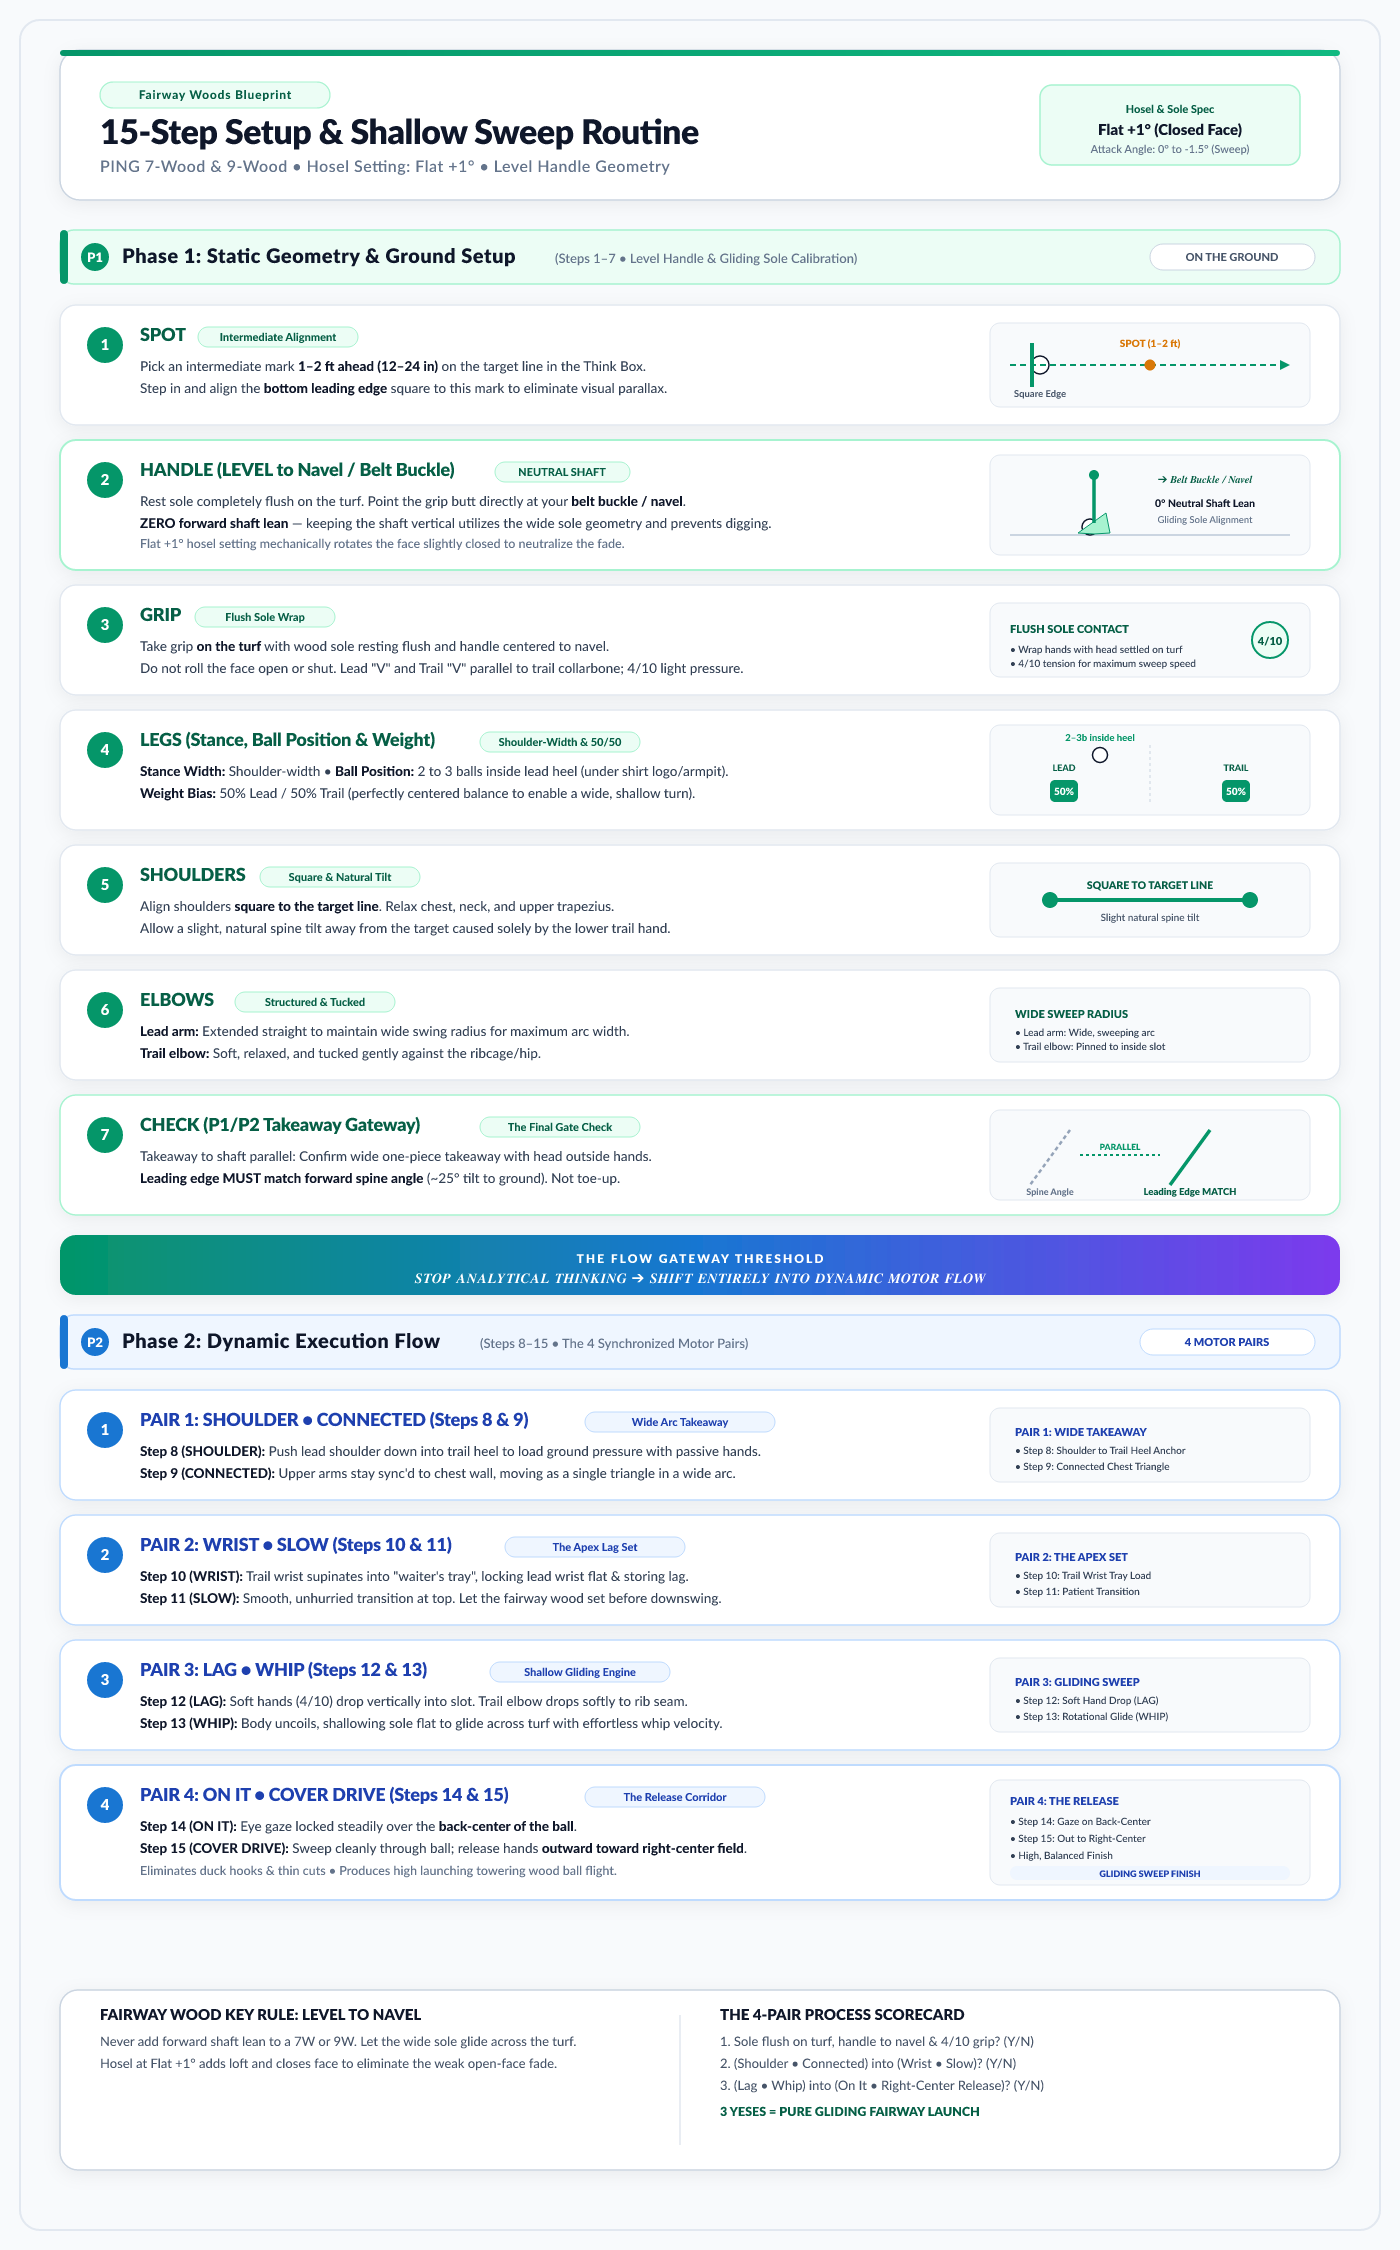
• fairway_woods_11_step_routine.svg • fairway_woods_11_step_routine.png
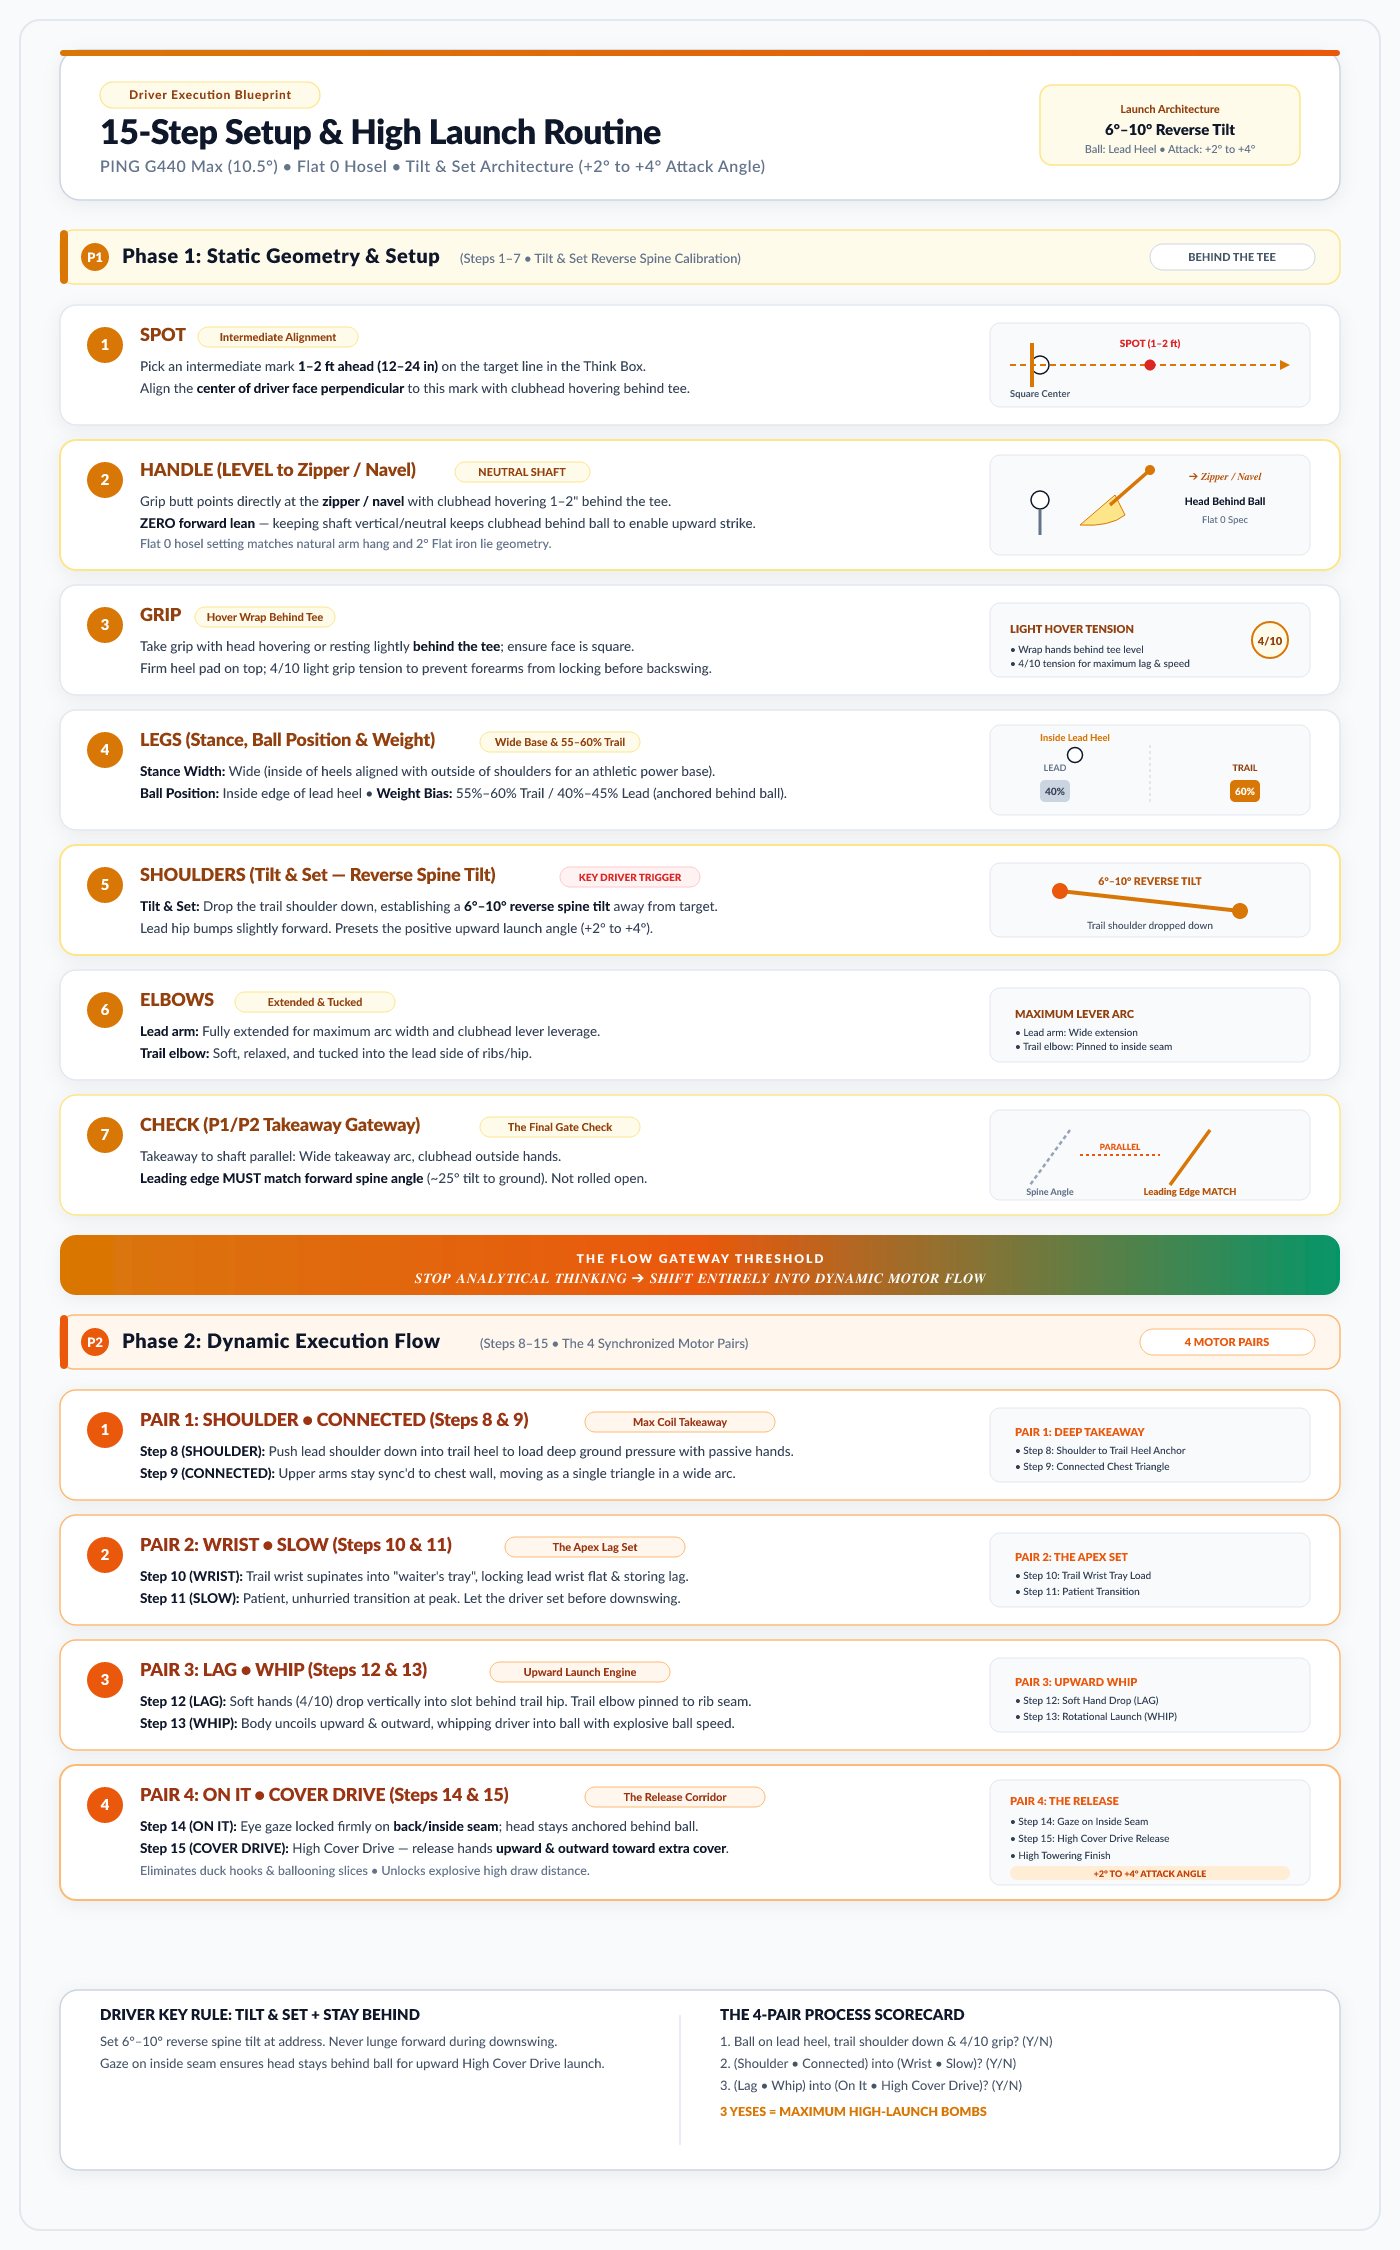
• driver_11_step_routine.svg • driver_11_step_routine.png
1. Mechanical Foundations: Irons vs. Fairway Woods vs. Driver
The universal checkpoints (SPOT, GRIP, ELBOWS, CHECK, SLOW, CONNECTED) remain constant across the entire bag. However, the club length, head volume, face roll/bulge, and launch physics require distinctly different setups for Fairway Woods and Driver compared to Irons:
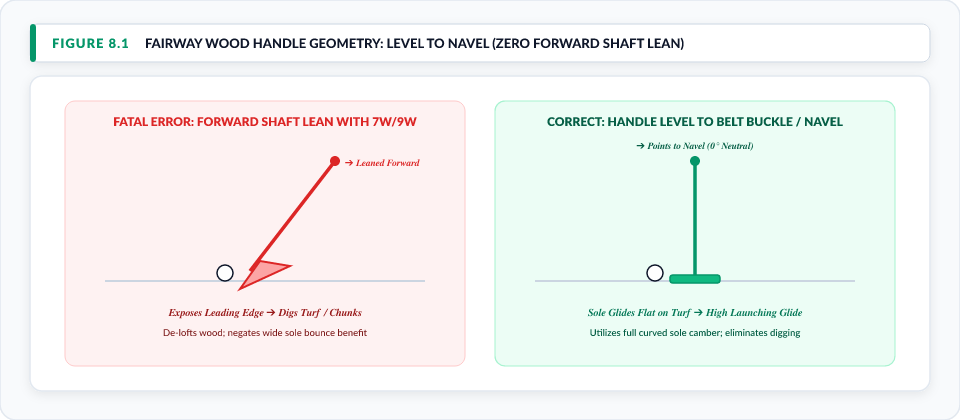
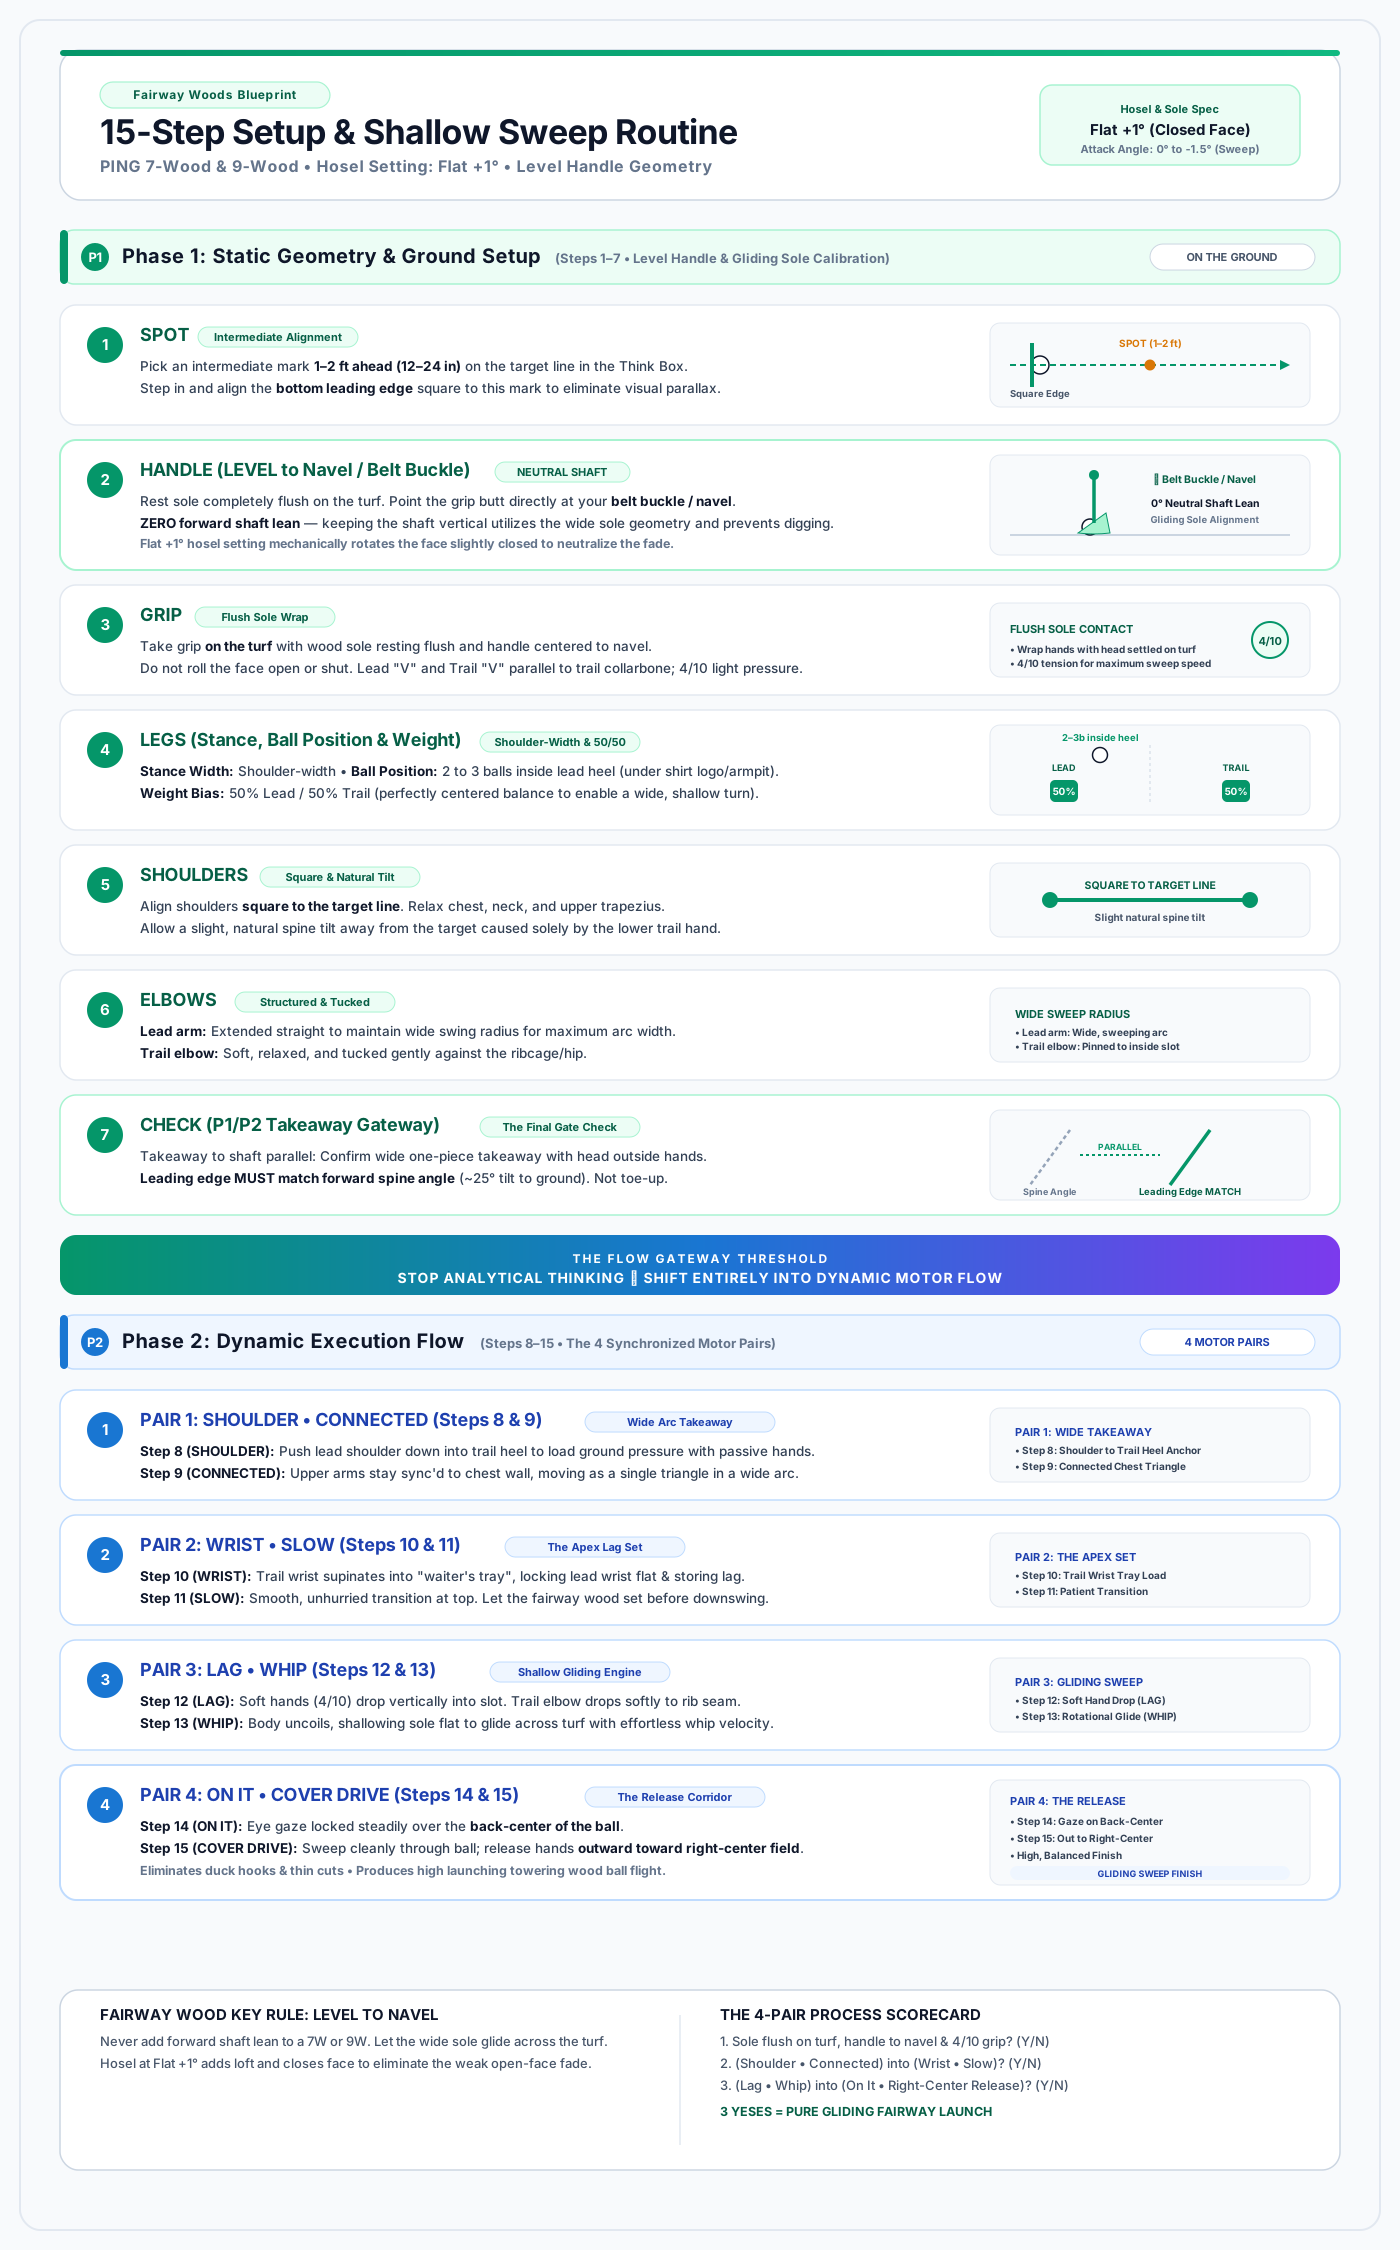
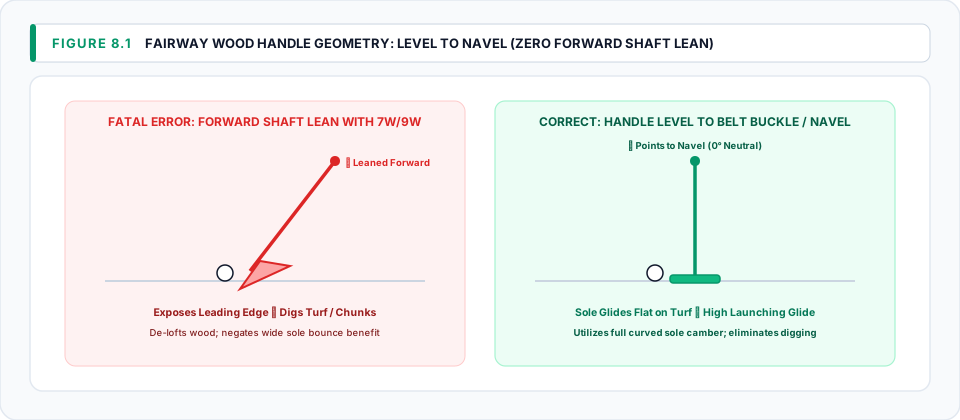
Figure 8.1: Fairway Wood Handle Geometry: Level to Navel (Zero Forward Shaft Lean). View Vector SVG
2. Equipment Specifications & Hosel Tuning Justification
PING Fairway Woods (7-Wood & 9-Wood) — Setting: Flat $+1^\circ$
- The Posture Problem: Standard factory PING fairway woods feature relatively upright lie angles ($58.5^\circ\text{–}59.5^\circ$). For a player with natural arm hang, an upright fairway wood causes the heel to catch the turf first, which twists the face violently open or shut.
- The Loft & Face Angle Mechanism: Setting the PING adjustable hosel sleeve to Flat $+1^\circ$:
- Flattens the lie angle to match posture and turf interaction.
- Adds $+1^\circ$ of static loft (7W becomes $\approx 22^\circ$; 9W becomes $\approx 25^\circ$).
- Rotates the face angle slightly closed at address. This mechanically eliminates the open-face fade without requiring conscious hand manipulation or wrist rolling.
PING Driver (10.5° G440 Max) — Setting: Flat 0
- The Posture & Lie Match: Setting the driver hosel to Flat 0 ($1^\circ$ flatter lie angle with standard $10.5^\circ$ loft) aligns the driver lie geometry ($57.5^\circ$) with the player's natural arm hang and flatter iron setup ($2^\circ$ Flat).
- The Geometry Rationale: Sits the driver head completely flush behind the ball, eliminating heel-down dragging and pull-hooks while enabling a clean, inside upward release into the High Cover Drive.
3. Fairway Woods Blueprint (PING 7W & 9W)
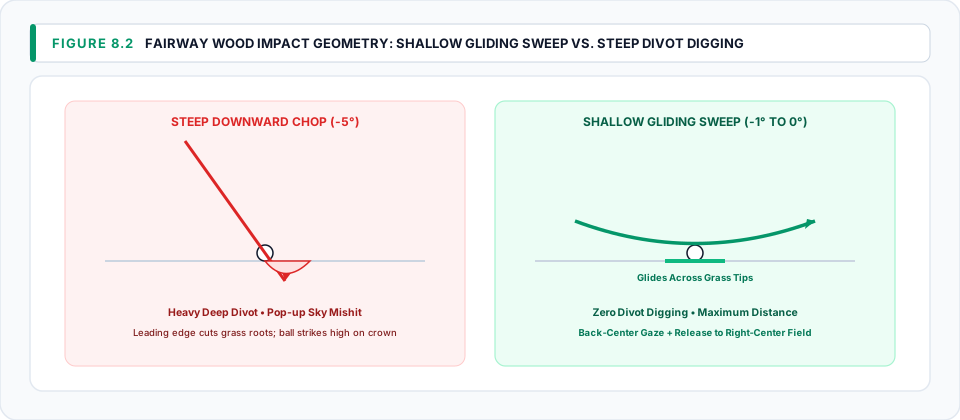
Fairway woods require a shallow, gliding sweep across the top of the turf rather than a downward chop.
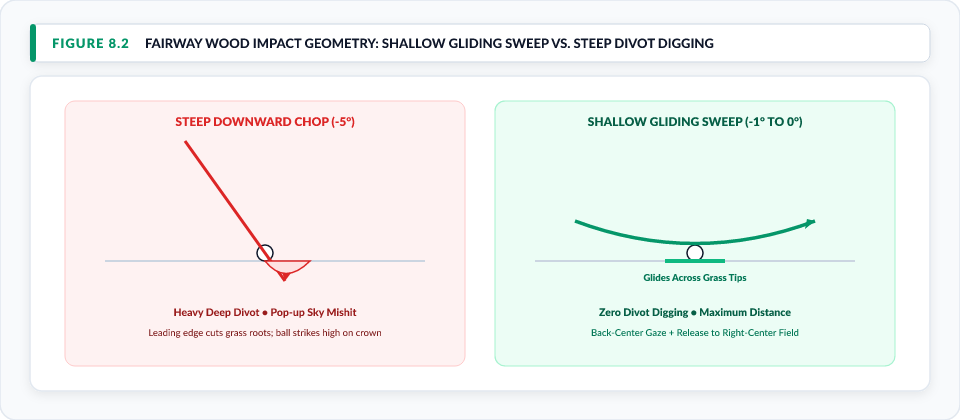
Figure 8.2: Fairway Wood Impact Geometry: Shallow Gliding Sweep vs. Steep Divot Digging. View Vector SVG
Step-by-Step Breakdown for Fairway Woods:
- Step 1: SPOT — Pick an intermediate mark 1–2 ft ahead. Align the bottom leading edge perpendicular to the line.
- Step 2: HANDLE (LEVEL)* — Rest the sole flush on the turf. Point the butt of the grip directly at the belt buckle / navel. NO forward shaft lean. A neutral shaft prevents the leading edge from digging.
- Step 3: GRIP — Take grip with sole resting flush on turf. Close fingers lightly without twisting the face shut.
- Step 4: LEGS* —
- Stance Width: Shoulder-width (inside edges of heels aligned with outside of shoulders).
- Ball Position: 2 to 3 balls inside the lead heel (directly under the lead shirt logo / lead armpit).
- Weight Distribution: 50% Lead / 50% Trail (perfectly balanced).
- Step 5: SHOULDERS* — Shoulders square to the target line; slight natural spine tilt away from target resulting from trail hand placement.
- Step 6: ELBOWS — Lead arm straight and structured; trail elbow soft and tucked against the ribs.
- Step 7: CHECK — Takeaway to P1 (shaft parallel): confirm leading edge matches forward spine angle.
- Step 8: SHOULDER (Pair 1) — Smooth takeaway ignited by the lead shoulder turning down into the trail heel (quiet, passive hands; deep ground load).
- Step 9: CONNECTED (Pair 1) — Upper arms stay sync'd to chest wall in a wide one-piece arc.
- Step 10: WRIST (Pair 2) — Trail wrist supinates/extends into the "waiter's tray", setting the lead wrist flat and storing lag.
- Step 11: SLOW (Pair 2) — Patient, unhurried transition at the top. Let the club set at the apex.
- Step 12: LAG (Pair 3) — Soft hands (4/10) drop vertically into the inside slot.
- Step 13: WHIP (Pair 3) — Body uncoils, shallowing delivery path ($2^\circ\text{–}3^\circ$ inside-out) and whipping sole across turf.
- Step 14: ON IT* (Pair 4) — Eye gaze locked steadily on the back-center of the golf ball (promotes a level sweep along the turf).
- Step 15: COVER DRIVE* (Pair 4) — Sweep cleanly through the ball; release hands out toward right-center field along the target corridor.
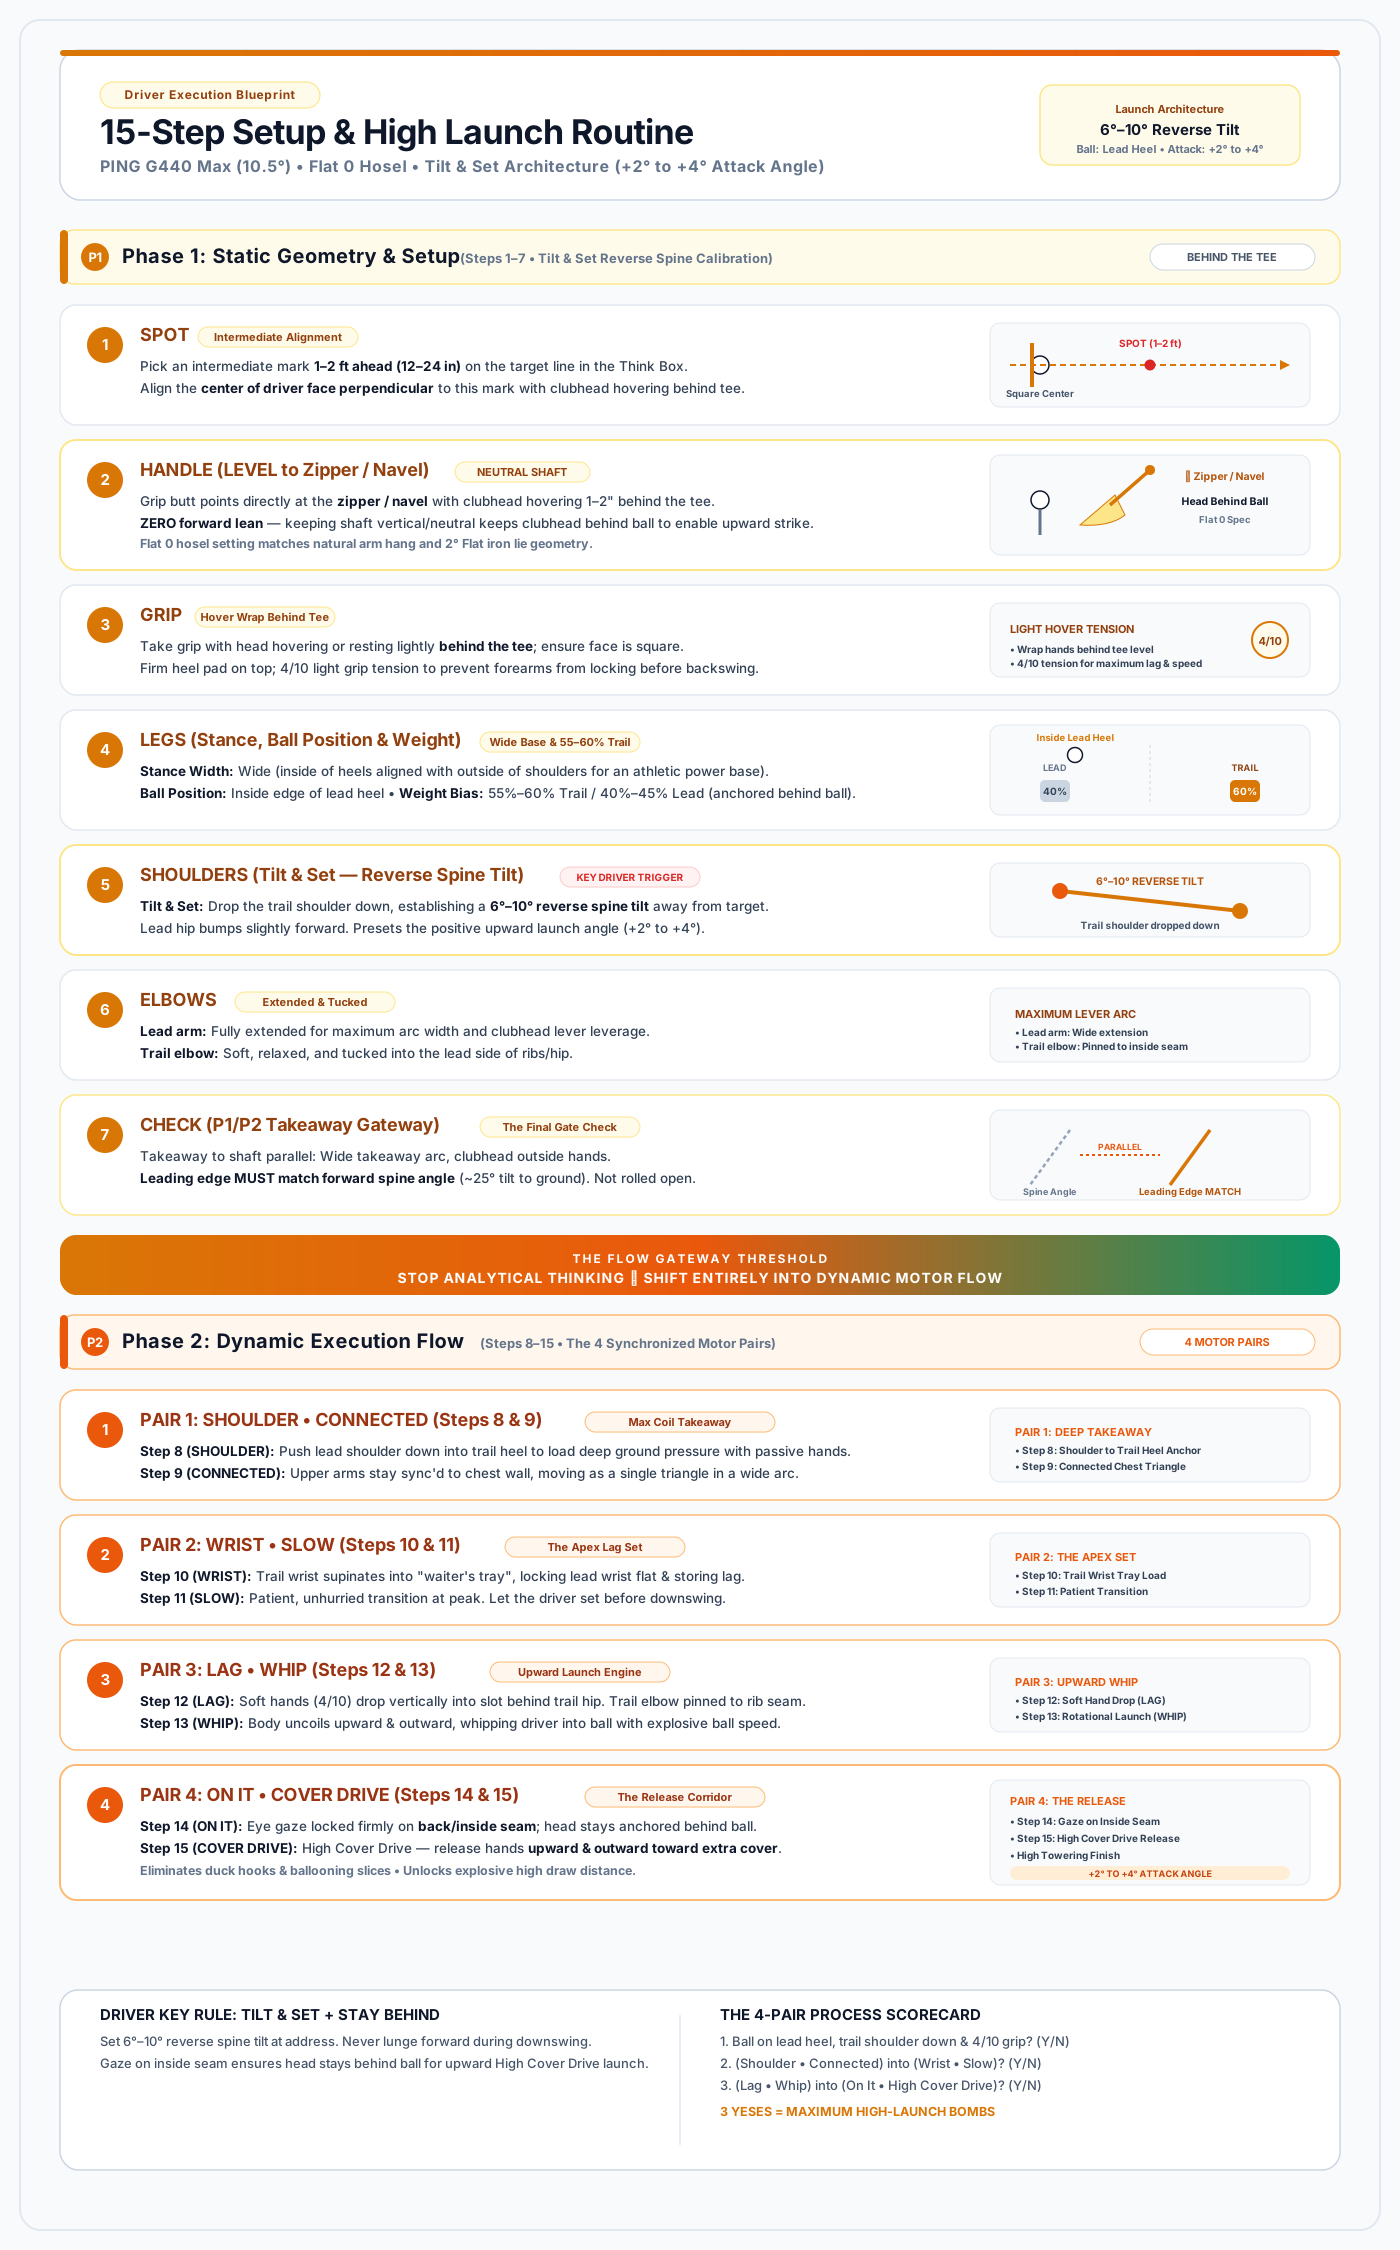
4. Driver Blueprint (PING G440 Max 10.5°)
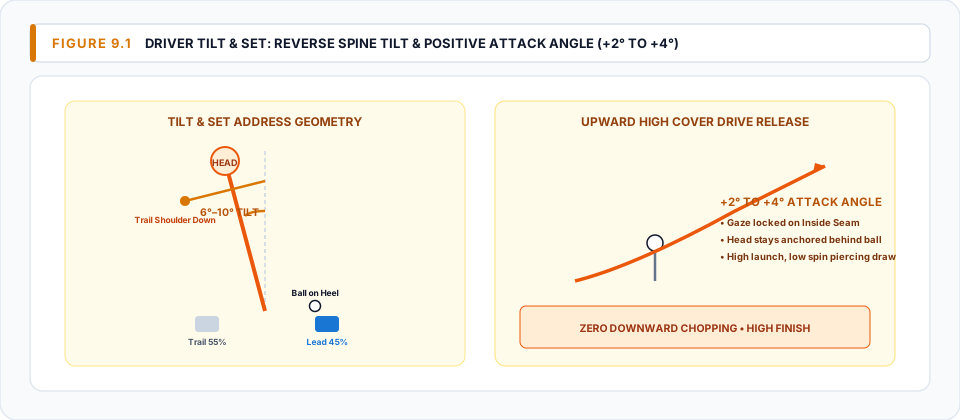
The driver is the only club designed to strike the ball on an upward angle of attack ($+2^\circ\text{ to }+4^\circ$) with the ball teed up in the air.
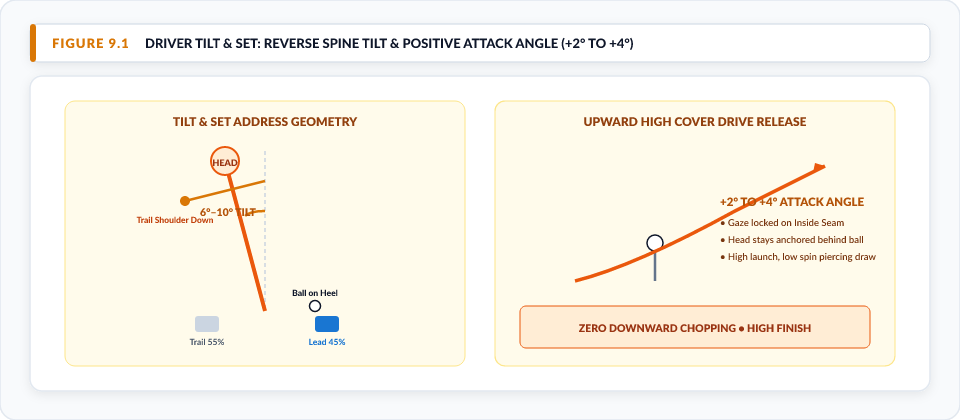
Figure 9.1: Driver Tilt & Set: Reverse Spine Tilt & Positive Attack Angle (+2° to +4°). View Vector SVG
Step-by-Step Breakdown for Driver:
- Step 1: SPOT — Pick an intermediate mark 1–2 ft ahead. Align the center face perpendicular to this line.
- Step 2: HANDLE (LEVEL)* — Grip butt points directly at the zipper / navel. Clubhead rests or hovers 1–2 inches behind the ball on the tee (neutral shaft axis).
- Step 3: GRIP — Take grip with head hovering/resting lightly behind the tee; maintain 4/10 grip pressure to allow free vertical drop.
- Step 4: LEGS* —
- Stance Width: Wide (inside of heels aligned with outside of shoulders; wide, athletic base).
- Ball Position: Inside edge of the lead heel (opposite the lead instep / front shoulder).
- Weight Distribution: 55%–60% Trail / 40%–45% Lead (anchored behind the ball).
- Step 5: SHOULDERS (Tilt & Set)* — Crucial Driver Key: Drop the trail shoulder downward, establishing a $6^\circ\text{–}10^\circ$ reverse spine tilt away from the target. Lead hip bumps slightly forward. This presets the upward launch angle.
- Step 6: ELBOWS — Lead arm extended for wide radius; trail elbow tucked into the lead side of the ribs/hip.
- Step 7: CHECK — Wide takeaway arc, clubhead outside hands, face matching spine angle.
- Step 8: SHOULDER (Pair 1) — Smooth takeaway ignited by the lead shoulder turning down into the trail heel (quiet, passive hands; deep ground coil).
- Step 9: CONNECTED (Pair 1) — Upper arms stay sync'd to ribcage as torso coils for maximum width.
- Step 10: WRIST (Pair 2) — Trail wrist supinates/extends into the "waiter's tray", setting the lead wrist flat and storing maximum lag.
- Step 11: SLOW (Pair 2) — Patient, unhurried transition at peak; let the driver set before downswing.
- Step 12: LAG (Pair 3) — Soft hands drop vertically into slot behind trail hip (zero pushing from shoulders).
- Step 13: WHIP (Pair 3) — Body uncoils upward and outward, whipping clubhead into ball with explosive ball speed.
- Step 14: ON IT* (Pair 4) — Eye gaze locked firmly on the back/inside seam of the ball. Upper center stays behind the ball through impact.
- Step 15: COVER DRIVE* (Pair 4) — High Cover Drive: Release hands upward and outward toward extra cover (high launch, low spin, piercing draw).
5. Comparative Execution Matrix: Full-Bag Setup Dimensions
| Setup Parameter | Irons (Apex Ai300) | Fairway Woods (7W / 9W) | Driver (PING G440 Max) |
|---|---|---|---|
| Hosel / Lie Tuning | $2^\circ$ Flat (Orange Dot) | Flat $+1^\circ$ (Slightly closed face) | Flat 0 ($1^\circ$ flatter lie match) |
| Handle Butt Aim | Lead Femoral Pulse (Groin) | Belt Buckle / Navel | Zipper / Navel |
| Shaft Lean Angle | $3^\circ\text{–}6^\circ$ Forward Lean | $0^\circ$ Neutral | $0^\circ$ Neutral / Slight Back |
| Stance Width | Narrow (Hip-width) | Medium (Shoulder-width) | Wide (Outside shoulders) |
| Ball Position | Center to $+1$ ball forward | 2–3 balls inside lead heel | Inside edge of lead heel |
| Weight Distribution | 60% Lead / 40% Trail | 50% Lead / 50% Trail | 55–60% Trail / 40–45% Lead |
| Spine Alignment | Square / Vertical | Slight natural tilt away | $6^\circ\text{–}10^\circ$ Reverse Spine Tilt |
| Takeaway Ignition | Lead Shoulder into Trail Heel (Passive hands) | Lead Shoulder into Trail Heel (Wide arc) | Lead Shoulder into Trail Heel (Deep ground coil) |
| Apex Lag Load | Trail Wrist Tray (Lead flat) | Trail Wrist Tray (Lead flat) | Trail Wrist Tray (Deep coil) |
| Transition / Delivery | Lag & Whip (Downward compression) | Lag & Whip (Shallow gliding sweep) | Lag & Whip (Upward whip release) |
| Visual Gaze Spot | Front Hemisphere (Lead top) | Back-Center (Shallow turf) | Inside-Back Seam (Stay behind) |
| Impact Geometry | Ball-then-turf downward chop | Gliding sweep off turf sole | Upward strike ($+2^\circ\text{ to }+4^\circ$) |
| Release Motor Cue | Low & Long compression | Right-Center field release | High Cover Drive (Up & Out) |
6. Diagnostic Matrix: Woods & Driver Faults & Ground-First Fixes
| Symptom / Ball Flight | Root Setup Fault | Biomechanical Consequence | Ground-First Correction |
|---|---|---|---|
| Sky Ball / Pop-Up (Driver) | Forward shaft lean or steep chop | Club strikes ball on downward arc, catching top edge of crown | Set handle LEVEL to zipper, ball on lead heel, add $6^\circ\text{–}10^\circ$ reverse spine tilt. |
| Weak High Slice (Woods) | Upright lie angle or open face at address | Heel digs early; club delivers open to out-to-in path | Tune hosel to Flat $+1^\circ$; confirm back-center gaze and right-center release. |
| Straight Left Pull (Driver) | Shoulders open at address; no spine tilt | Swing cuts across line outside-in; hands flip closed | Execute Tilt & Set (trail shoulder down); keep gaze on inside seam behind ball. |
| Thin / Topped Fairway Wood | Weight falling back or trying to lift ball | Low point bottoms out before ball; sole bounces into top half | Maintain 50/50 balance; keep head steady; sweep through to right-center field. |